Adventures with I²C
26 January, 2019I went to London last weekend to attend the Agorama Web Jam and had a super groovy time. Everyone was so friendly and welcoming. Felt great to be hanging with cypherhomies in proximal timespace, dreaming and growing brighter futures together. I got to meet and chat with @eb4890 about PeachCloud and gained a better understanding of their plans around dyndns with SSB integration. Stoked to see that developing! It was also really encouraging to hear different folx voicing the need / desire for plug-n-plug p2p devices; fuel for the inner fire. Big thanks to all involved.
TLDR: Real-Time Clock Module added to Pi / PeachCloud (I²C is working on Debian Buster ARM64)
I spent most of my week doing web design work on another project. Finally got that finished and deployed yesterday and decided some hardware hacking would be a nice change of pace. Adding a real-time clock (RTC) felt like an achievable goal - one which would allow me to lean a little further into basic electronics & hardware shenanigans. @mikey already had this on the ‘next steps’ list for PeachCloud:
add Real-Time Clock to keep track of time (so you can be off-grid and still know the time)
I received a DS1338 RTC module as a Christmas gift for this project (thanks Dad). The datasheet can be accessed here. A note from the retailer’s website:
A Real Time Clock Module with battery backup using the easy to use DS1338 chip. The DS1338 is functionally the same as the popular DS1307 chip with the difference being that the DS1338 works at any voltage from 3V to 5V making it easy to use on either 3.3V and 5V systems without modification or logic level conversion. Ideal for your project including Arduino and Raspberry Pi projects.
I received my first lesson in soldering last week and attached pins to the RTC. That made it a simple process to plug the module into my breadboard and connect it to the Pi. The module works on I²C and only requires 4 connecting wires (power, ground, SDA, SCL). The I²C pins on the Pi include a fixed 1.8 kohms pull-up resistor to 3.3v, meaning that no additional resistors needed to be included in the wiring setup.
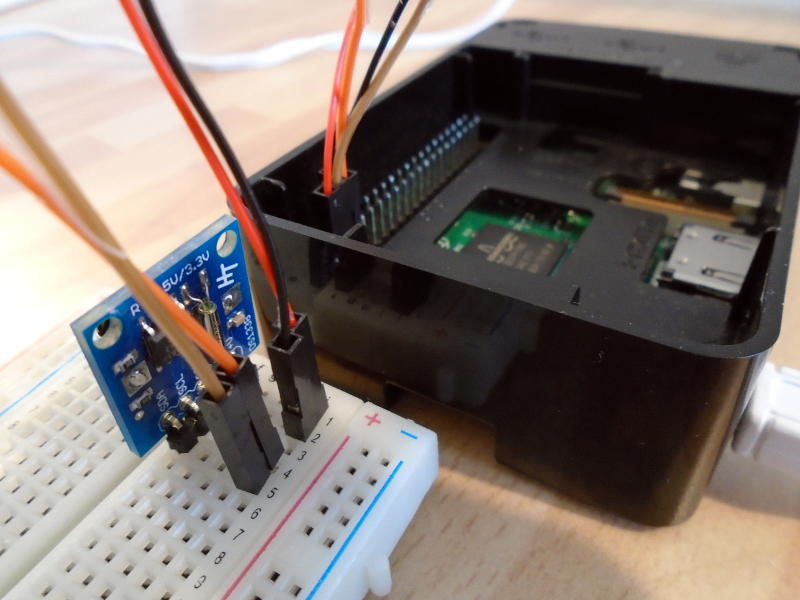
Following the AdaFruit guide to Adding a Real Time Clock to Raspberry Pi (with small additions), I was able to run an I²C scan and verify that the module was wired correctly to the Pi:
sudo apt-get install python-smbus i2c-toolssudo modprobe i2c-devsudo i2cdetect -y 1The final command in the sequence prints an array to the console, with 68 denoting the presence of the RTC module. This is a sign that the device is properly wired and connected. Great! This is where things started to get tricky…
If we were running Raspbian for this project the next steps would be pretty simple. As it turns out, the process for Debian Buster ARM64 is quite a bit more complicated. A blog post I found last night neatly summarizes the pros and cons of this choice:
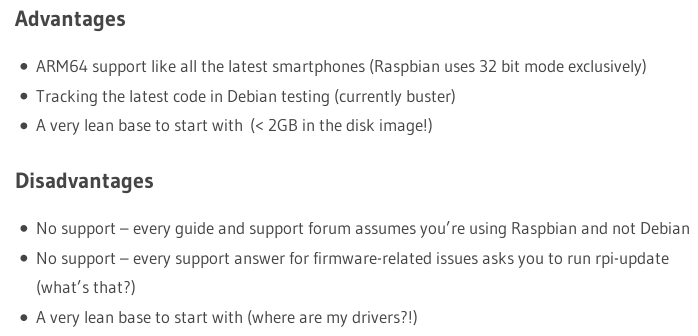
No kidding! There were, however, a few crumbs along the way to sustain me over the course of the journey. These included What is needed to get I²C working with Debian Jessie? and "I2C transfer failed" flooding the logs.
I appended dtoverlay=i2c-rtc,ds1307 and dtparam=i2c_arm=on to /boot/firmware/config.txt and i2c-dev to /etc/modules but the RTC device was still not coming under control of the kernel driver. When I looked at /var/log/kern.log I found an i2c could not read clock-frequency property error which led me to the second of the two posts linked in the paragraph above. It seemed I would need to decompile, patch and recompile the device tree blob for my Pi. I copied /boot/firmware/bcm2837-rpi-3-b.dtb from the Pi to my laptop for the following steps:
sudo apt-get install device-tree-compilercd /place/where/dtb/file/was/pasteddtc -I dtb -O dts > bcm2837-rpi-3-b.dtsThat gave me a human-readable decompiled device tree (dts). I then manually added clock-frequency = <0x186a0>; to the generated dts file (line 570 for me).
Recompiled the dts to binary blob format:
dtc -O dtb -o bcm2837-rpi-3-b.dtb bcm2837-rpi-3-b.dts
This left me with a patched dtb to replace the faulty dtb on the Pi. At this point I was thinking: ‘I don’t know what I’m doing but it feels pretty cool’. Once I’d patched the dtb and rebooted my Pi I no longer had clock-frequency errors in the kernel logs - a minor victory! Still, I couldn’t seem to get the RTC kernel driver to work. Eventually I returned to Instructions to Configure DS1307 or DS1338 RTC and had another go:
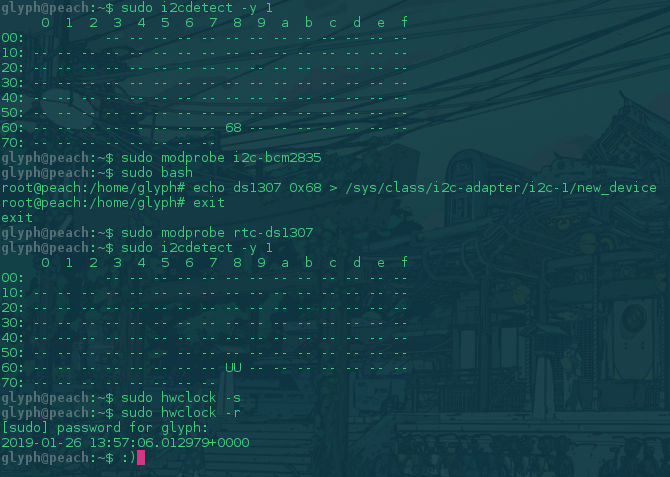
sudo modprobe i2c-bcm2835sudo bashecho ds1307 0x68 > /sys/class/i2c-adapter/i2c-1/new_deviceexitsudo modprobe rtc-ds1307
I ran sudo i2cdetect -y 1 for the 234th time and bingo! It works! Running around room celebrating.
This is really exciting because it opens the door to (relatively) easy integration of other I²C devices (sensors, LCD displays etc.). Next step will be to fine-tune the process so that everything loads correctly on boot. If you stuck with me this far - thanks for reading!